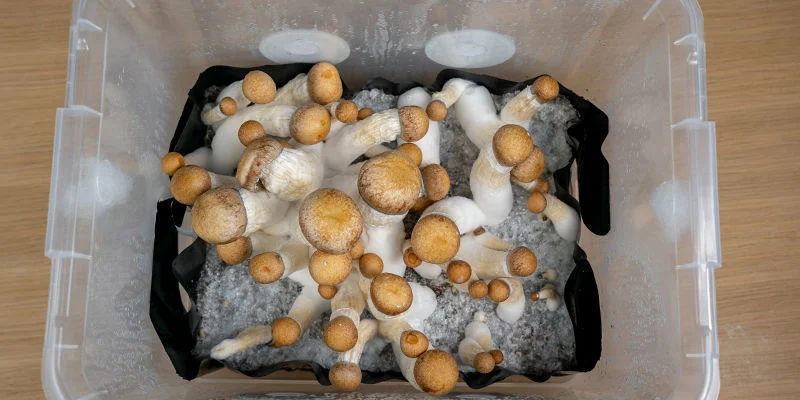
Monotubs are one of the most popular and beginner-friendly setups for growing mushrooms at home. They’re simple, effective, and cost-efficient, making them a fantastic option for both novice and experienced cultivators. In this guide, we’ll walk you through how to make a monotub, optimize it for mushroom growth, and ensure your cultivation process runs smoothly. Let’s get started!
A monotub is a plastic container modified to create the perfect environment for growing mushrooms. It’s designed to maintain proper humidity, airflow, and light, simulating the ideal conditions for mycelium to thrive and fruit mushrooms. This all-in-one solution is great for growing a variety of species, including gourmet and medicinal mushrooms.
Before you start building your monotub, gather the following materials:
- A large plastic storage tub (45-66 liters is ideal)
- A drill or soldering iron
- Polyfill, micropore tape, or rubber grommets (for air exchange holes)
- A liner or black trash bag (to prevent side-pinning)
- Substrate (such as a mix of coco coir and vermiculite)
- Spawn (colonized grain or another inoculated medium)
- Spray bottle with water
Step-by-Step Instructions to Make a Monotub
1. Choose Your Tub Select a plastic storage tub with a tight-fitting lid. Clear or semi-transparent tubs work best, as they allow light to penetrate while still maintaining high humidity. Make sure the tub is large enough to accommodate your substrate and mushrooms as they grow. 2. Drill the Holes Using a drill or soldering iron, create holes in the tub for proper air exchange. Here’s how: Drill four holes near the bottom of the tub (two on each long side), just above the level where the substrate will sit. Drill four additional holes near the top of the tub, evenly spaced around the sides. These holes allow fresh air to enter while letting carbon dioxide escape, creating an ideal growing environment. 3. Add Air Exchange Covers Cover the holes with either polyfill, micropore tape, or rubber grommets. These materials allow air to pass through while keeping contaminants out. Adjust the density of the covering depending on the humidity and airflow requirements of your chosen mushroom species. 4. Line the Tub Line the bottom and sides of the tub with a black trash bag or a fitted liner. This step helps prevent side-pinning—a phenomenon where mushrooms grow on the sides of the tub instead of the top of the substrate. Tape the liner securely to the edges to keep it in place. 5. Prepare and Add the Substrate Prepare your substrate by pasteurizing a mix of coco coir and vermiculite. Once cooled, add the substrate to the lined tub, creating a layer about 3-4 inches thick. Level it out for even growth. 6. Mix in the Spawn Break up your colonized spawn and mix it evenly into the substrate. Spread it out gently to avoid damaging the mycelium. Ensure the spawn is fully incorporated for consistent colonization. 7. Allow Colonization Cover the tub with the lid and place it in a warm, dark area (70-75°F is ideal). During this phase, the mycelium will colonize the substrate. This process can take 1-2 weeks, depending on the species and conditions. 8. Introduce Fruiting Conditions Once the substrate is fully colonized (a solid white layer of mycelium will be visible), it’s time to introduce fruiting conditions: Move the tub to an area with indirect light. Increase fresh air exchange by loosening the polyfill or adjusting the micropore tape on the holes. Maintain high humidity (85-95%) by misting the walls of the tub with water using a spray bottle. 9. Harvest Your Mushrooms After 5-10 days in fruiting conditions, you’ll see mushrooms beginning to form. Harvest them when the caps are fully open but before the veil breaks for the best quality. Use a clean knife or scissors to cut the mushrooms at the base.
Use a Still-Air Box: To minimize contamination while preparing your spawn and substrate, consider using a still-air box. Learn how to make one here.
Monitor Humidity and Airflow: Too much humidity can lead to contamination, while too little can dry out the substrate. Aim for balance.
Start with Easy Strains: If you’re new to monotub cultivation, begin with forgiving strains like blue oyster.
Cost-Effective: Monotubs are affordable to build and maintain. Efficient: They provide the ideal environment for mushrooms with minimal effort. Scalable: You can create multiple monotubs to grow larger quantities.
Frequently Asked Questions
Q: How long does it take to grow mushrooms in a monotub? A: From inoculation to harvest, the process typically takes 4-6 weeks. Q: Can I reuse a monotub? A: Yes, but clean and sterilize it thoroughly before starting a new batch. Q: What type of mushrooms can I grow in a monotub? A: Monotubs are versatile and can be used to grow a variety of species, including gourmet and medicinal mushrooms.
Making a monotub is a simple and rewarding project that opens the door to successful mushroom cultivation. By following this guide and maintaining a sterile environment, you’ll be well on your way to growing your own fresh mushrooms at home. Start building your monotub today and enjoy the satisfaction of growing your own fungi!
